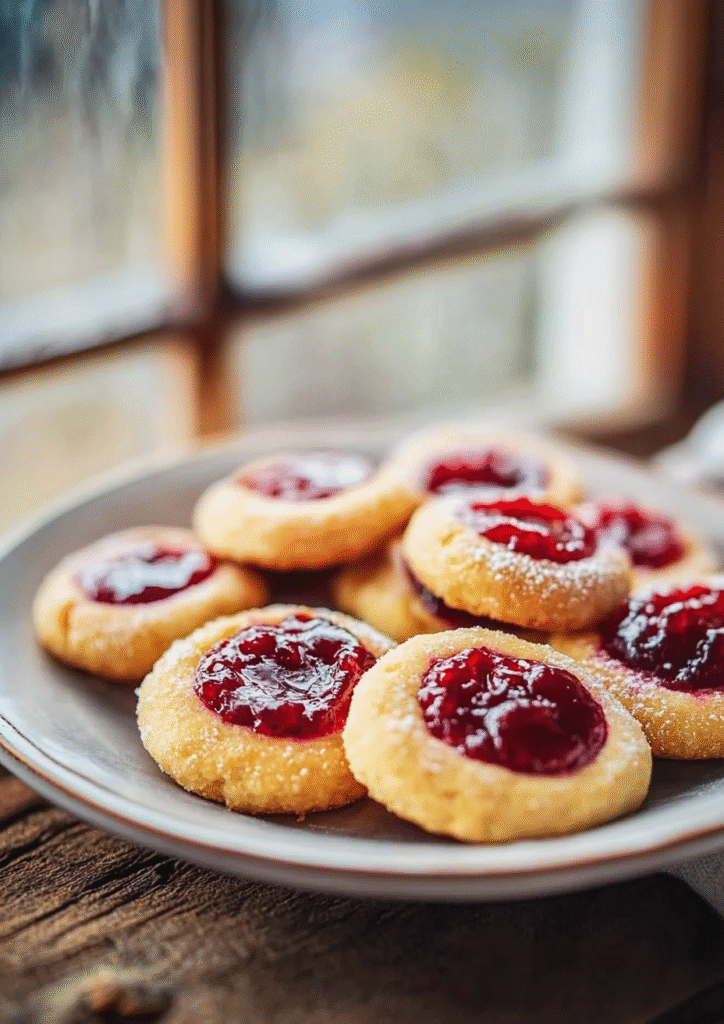
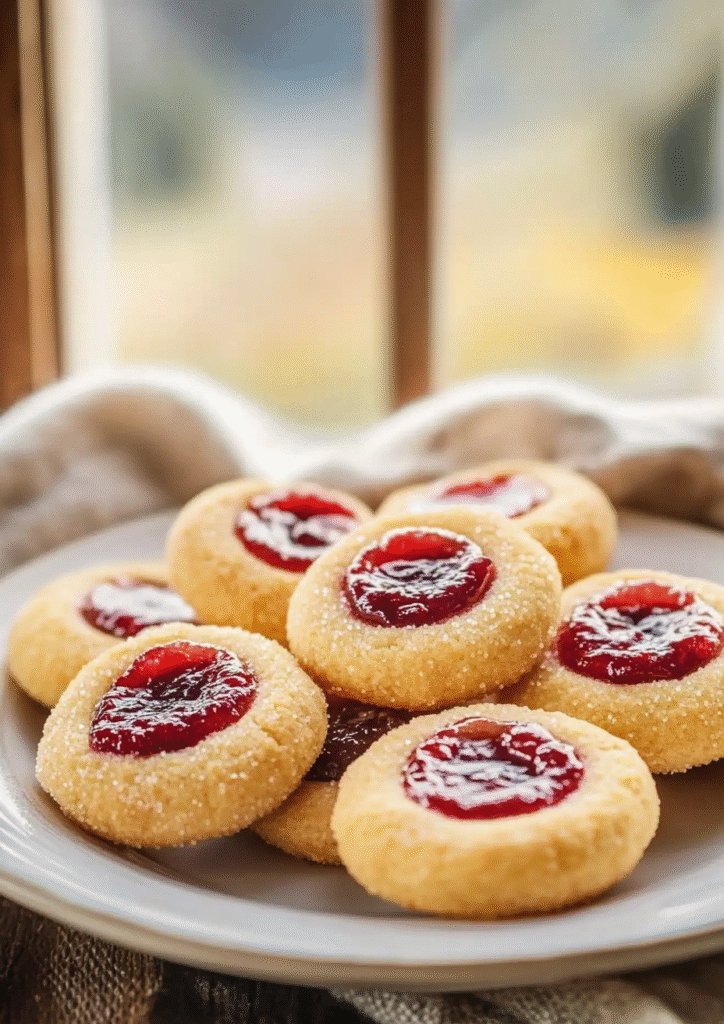
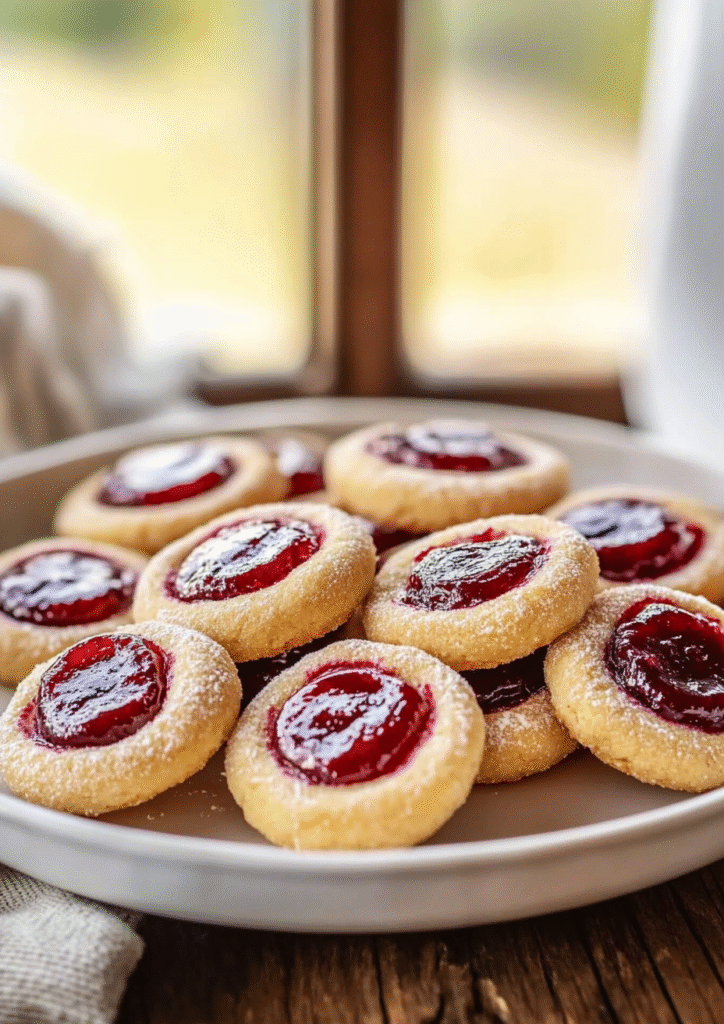
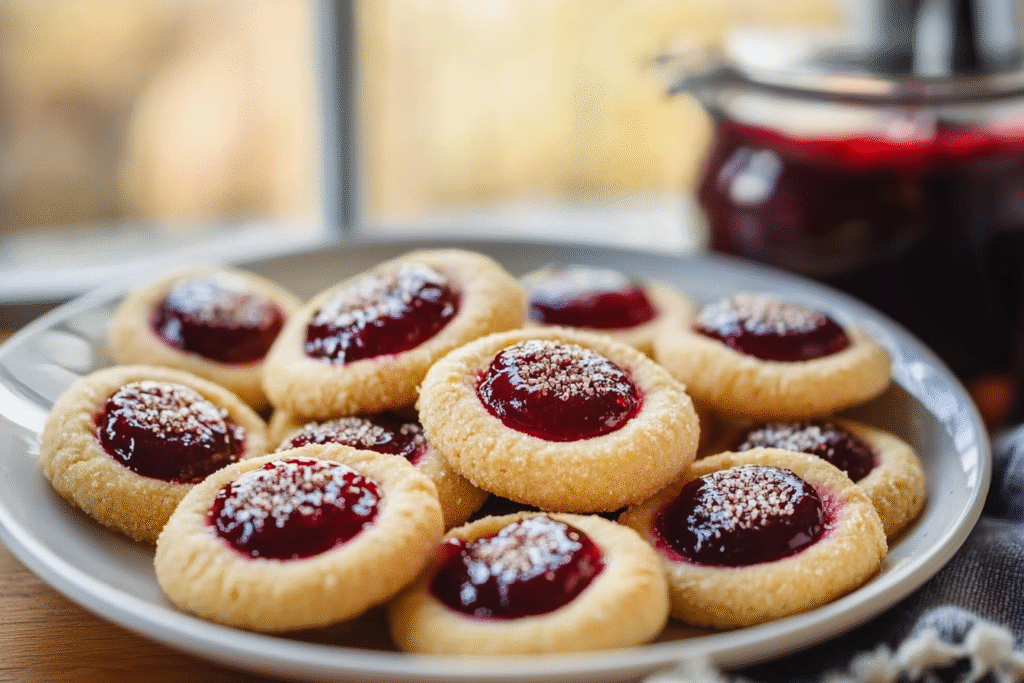
Rustic Huckleberry Jam Thumbprint Cookies are the perfect blend of buttery shortbread and tangy-sweet fruit. These classic cookies are easy to make, yet feel nostalgic and special—like something straight from grandma’s kitchen, with a modern, flavorful twist. Huckleberries, often found in the wild regions of the Pacific Northwest, offer a bold, slightly tart flavor that elevates this simple recipe into something unforgettable.
Whether you’re baking for the holidays, summer gatherings, or just for fun, these cookies always impress. They’re easy to prepare, kid-friendly, and ideal for gifting. Plus, with just a few pantry staples and a dollop of vibrant huckleberry jam, they look as good as they taste.
This blog will walk you through everything—from ingredients and baking tips to customization ideas and storage solutions. Let’s get started!
Why You’ll Love This Huckleberry Thumbprint Cookies
- 🍪 Simple & Fun to Make: Great for beginners or baking with kids.
- 💜 Bold Flavor: Huckleberry jam brings a unique, sweet-tart kick.
- 🎁 Perfect for Gifting: Elegant, homemade, and travel well.
- 🍋 Easy to Customize: Swap the jam, add citrus zest, or sprinkle with nuts.
- ⏳ Make-Ahead Friendly: Stay fresh for days—great for planning ahead.
- 🌿 Nostalgic & Comforting: Old-fashioned feel with modern taste.
What You’ll Need
To make these rustic huckleberry thumbprint cookies, you only need a handful of everyday ingredients. Each one plays a key role in delivering that soft, buttery texture and bright burst of fruit flavor. Here’s everything you’ll need:
Dry Ingredients:
- 2 cups (240g) all-purpose flour – for structure and a tender bite.
- 1/4 teaspoon salt – enhances flavor.
Wet Ingredients:
- 1 cup (226g) unsalted butter, softened – the rich, creamy base.
- 2/3 cup (135g) granulated sugar – just the right amount of sweetness.
- 1 large egg yolk – adds richness and binds the dough.
- 1 teaspoon vanilla extract – classic flavor depth.
- Zest of 1 lemon – optional, but brightens the cookie flavor.
Filling:
- 1/2 cup (120g) huckleberry jam – the star of the show. If unavailable, wild blueberry jam works too.
Optional Garnish:
- Powdered sugar – for a soft dusting before serving.
- Finely chopped almonds or walnuts – can be gently pressed into the dough edges.
Make sure to use room-temperature butter so the dough comes together smoothly. If using homemade jam, ensure it’s not too runny—thicker jam holds its shape better during baking.
How to Make Huckleberry Thumbprint Cookies
Follow these simple steps to create a batch of delicious huckleberry thumbprint cookies. This recipe yields about 24 cookies.
Step-by-Step Instructions:
- Preheat Oven
Set your oven to 350°F (175°C). Line a baking sheet with parchment paper or a silicone baking mat. - Make the Dough
In a large mixing bowl, cream together the butter and sugar until light and fluffy (about 2–3 minutes using an electric mixer).
Add the egg yolk, vanilla extract, and lemon zest (if using). Mix until fully combined.
Gradually add the flour and salt, mixing just until a soft dough forms. - Shape the Cookies
Scoop about 1 tablespoon of dough and roll into a ball. Place on the baking sheet, spaced 2 inches apart.
Using your thumb or the back of a teaspoon, gently press an indentation into the center of each ball. - Add the Jam
Spoon about 1/2 teaspoon of huckleberry jam into each indentation. Don’t overfill—it will spread during baking. - Bake
Bake for 12–14 minutes, or until the edges are just golden.
Remove from oven and let cool on the sheet for 5 minutes, then transfer to a wire rack to cool completely. - Optional Finish
Once cooled, dust lightly with powdered sugar or add a sprinkle of finely chopped nuts for texture.
Enjoy these cookies with tea, lemonade, or a glass of milk—they’re perfect for any time of day!
You Must Know
To get the best results with huckleberry thumbprint cookies, here are key things to keep in mind:
- Room Temp Ingredients: Use softened butter and a room-temperature egg yolk for a smooth, cohesive dough.
- Thick Jam is Best: A thicker jam won’t leak or bubble over. If yours is too runny, simmer it for a few minutes to reduce.
- Avoid Overmixing: Mix until the dough just comes together—overmixing leads to tough cookies.
- Chilling Helps: If the dough feels too soft, chill it for 20–30 minutes before shaping.
- Gentle Indent: Press lightly when forming the center so the dough doesn’t crack.
- Don’t Overbake: Bake until just golden at the edges—overbaking dries them out.
- Use Fresh Jam: Always check your jam for freshness to avoid off flavors.
Following these simple points makes a big difference in texture, flavor, and appearance.
Perfecting the Cooking Process
Perfecting these cookies is all about control and consistency:
- Cream Properly: Beat the butter and sugar for 2–3 minutes to create a light, fluffy base.
- Scoop Evenly: Use a small cookie scoop for uniform cookies that bake evenly.
- Fill Neatly: Add about ½ teaspoon of jam to each indent—don’t overfill.
- Line the Tray: Use parchment paper to prevent sticking and promote even baking.
- Bake Smart: Bake one tray at a time in the center of the oven at 350°F for 12–14 minutes.
- Cool Carefully: Let cookies rest on the tray for 5 minutes before transferring to a rack.
- Optional Finish: A dusting of powdered sugar or drizzle of lemon glaze adds polish.
Small steps lead to bakery-quality results—crispy edges, tender centers, and jam that stays put.
Add Your Touch
One of the best parts of thumbprint cookies? You can customize them easily. Here’s how to make the recipe your own:
- Jam Variety: No huckleberry? Try wild blueberry, raspberry, or blackberry jam. Even apricot or fig works beautifully.
- Citrus Zest: Add orange or lime zest to the dough for a flavor twist.
- Nutty Edges: Roll dough balls in finely chopped almonds or pecans before baking for extra crunch and contrast.
- Spiced Dough: Add a pinch of cinnamon or cardamom to the dough for warmth.
- Glaze or Dusting: Drizzle cooled cookies with lemon icing or dust lightly with powdered sugar for a bakery finish.
- Mini Version: Make smaller cookies for party platters or lunchbox treats—just adjust baking time to 9–11 minutes.
These cookies are a blank canvas for creativity, and small changes go a long way in making each batch special.
Storing & Reheating
Proper storage keeps your thumbprints fresh, soft, and full of flavor:
Explore quick and easy recipes you’ll love
- Room Temperature: Store in an airtight container for up to 5 days. Layer with parchment paper to prevent sticking.
- Refrigerate for Longer Freshness: They’ll last up to 10 days in the fridge—bring to room temp before serving.
- Freeze for Later: Place cooled cookies in a freezer-safe container with parchment between layers. Freeze for up to 2 months.
- Reheating Tips: Thaw frozen cookies at room temp or warm in a 300°F oven for 4–5 minutes to refresh texture.
Want cookies that stay soft? Slip a slice of bread into the container—works like magic to maintain moisture.
Chef’s Helpful Tips
Get the most out of your huckleberry thumbprint cookies with these pro-style tips:
Whip up this crowd-pleaser today
- Soften Butter Right: Let butter sit out for 30–60 minutes. Too soft or melted can ruin the dough texture.
- Use a Measuring Spoon for Indents: A ½ teaspoon measure creates uniform wells without cracking the dough.
- Double the Jam: Make extra jam-filled cookies—people always want seconds!
- Rotate the Pan: Halfway through baking, turn your baking sheet for even color and texture.
- Chill Between Batches: If making a large batch, keep extra dough in the fridge so it stays firm.
- Decorate Last-Minute: Dust with powdered sugar or drizzle glaze only after cookies are completely cool to avoid melting.
Little adjustments like these take your cookies from homemade to professional-level results.
FAQ
Can I use frozen huckleberries to make jam for these cookies?
Yes! Just simmer them with sugar and a bit of lemon juice until thickened. Cool completely before using.
What if I don’t have huckleberry jam?
Use any thick fruit jam—blueberry, raspberry, or apricot are great substitutes.
Try this mouthwatering recipe next
Can I make these gluten-free?
Absolutely. Just replace the flour with a 1:1 gluten-free baking blend.
How do I prevent the jam from spreading?
Use a thicker jam and don’t overfill. Chill the cookies before baking if needed.
Do these cookies travel well?
Yes, they stack well in tins with parchment between layers—great for gifting and parties.
Conclusion
Rustic Huckleberry Jam Thumbprint Cookies are more than just a treat—they’re a reminder that the simplest recipes often bring the most joy. With their soft, buttery base and jewel-like centers of rich huckleberry jam, they’re a beautiful blend of nostalgia and bold flavor. Whether you’re baking for a special occasion or simply sharing something homemade with family and friends, these cookies deliver every time.
They’re easy to make, endlessly customizable, and perfectly sweet with a tart twist. You don’t need fancy tools or hours in the kitchen—just quality ingredients and a little love. From prepping the dough to that satisfying thumbprint in the center, this is the kind of recipe that becomes a family favorite for years to come.
So, gather your ingredients, preheat your oven, and start baking. One bite in, and you’ll understand why these cookies are truly irresistible.
Delicious Rustic Huckleberry Thumbprint Cookies You’ll Love
Description
Buttery, tender thumbprint cookies filled with sweet-tart huckleberry jam—perfect for a quick, nostalgic treat.
Ingredients
Instructions
Preheat oven to 350°F (175°C) and line a baking sheet with parchment.
Cream butter and sugar until fluffy. Mix in egg yolk, vanilla, and lemon zest.
Add flour and salt, mix until just combined.
Roll dough into 1-tablespoon balls; place on sheet 2 inches apart.
Press thumb into each ball to make an indentation.
Fill each indentation with ½ teaspoon jam.
Bake 12–14 minutes until edges are lightly golden. Cool 5 minutes on sheet, then transfer to rack.
Notes
- Use thick jam to avoid spreading.
Chill dough for 20 minutes if too soft.
Store in airtight container for up to 5 days or freeze up to 2 months.