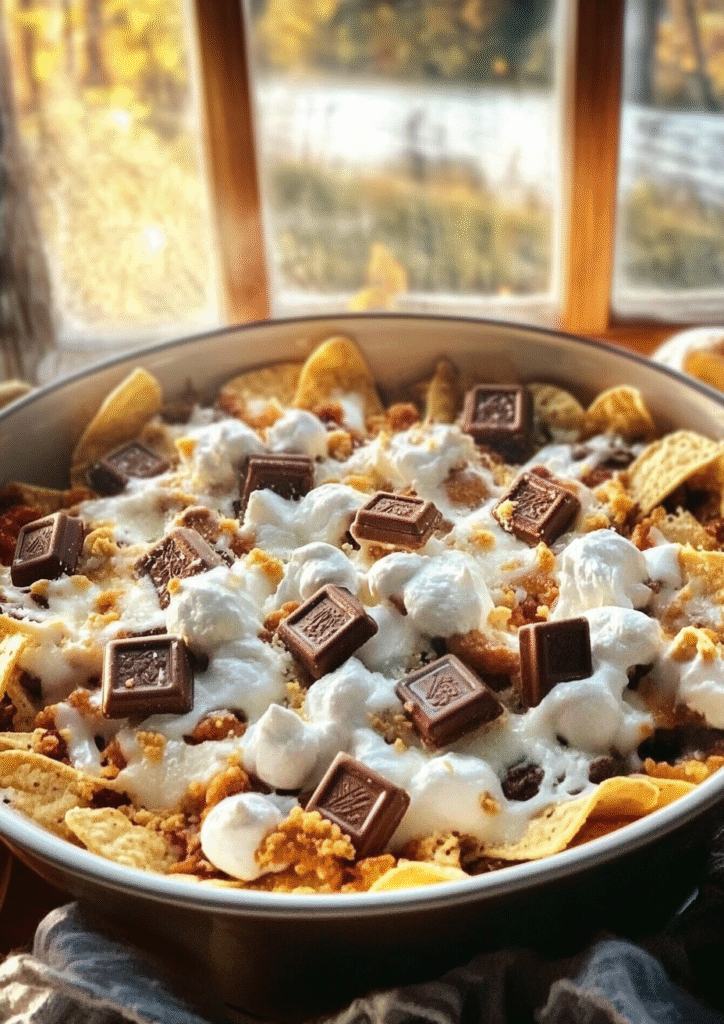
Get ready to transform your dessert game with Irresistible S’mores Nachos—the ultimate sweet treat that combines everything you love about classic campfire s’mores with the fun, shareable nature of nachos. Perfect for cozy nights in, festive gatherings, or backyard fire pits, this dessert is melty, crunchy, gooey, and insanely fun to eat.
No need for a roaring campfire—this recipe brings all the nostalgia and flavor right to your oven or grill. With just a few simple ingredients and minimal prep time, you’ll have a crowd-pleasing dessert that looks impressive but is incredibly easy to make. Whether you’re entertaining kids, treating yourself, or bringing a smile to a group of friends, these nachos are guaranteed to satisfy every sweet tooth.
In this blog, you’ll discover exactly why this dessert works, how to make it step-by-step with full measurements, storage tips, chef tricks, and even ways to customize it with your own special touch. It’s time to ditch the same-old desserts and get ready for something unforgettable!
Why You’ll Love This S’mores Nachos
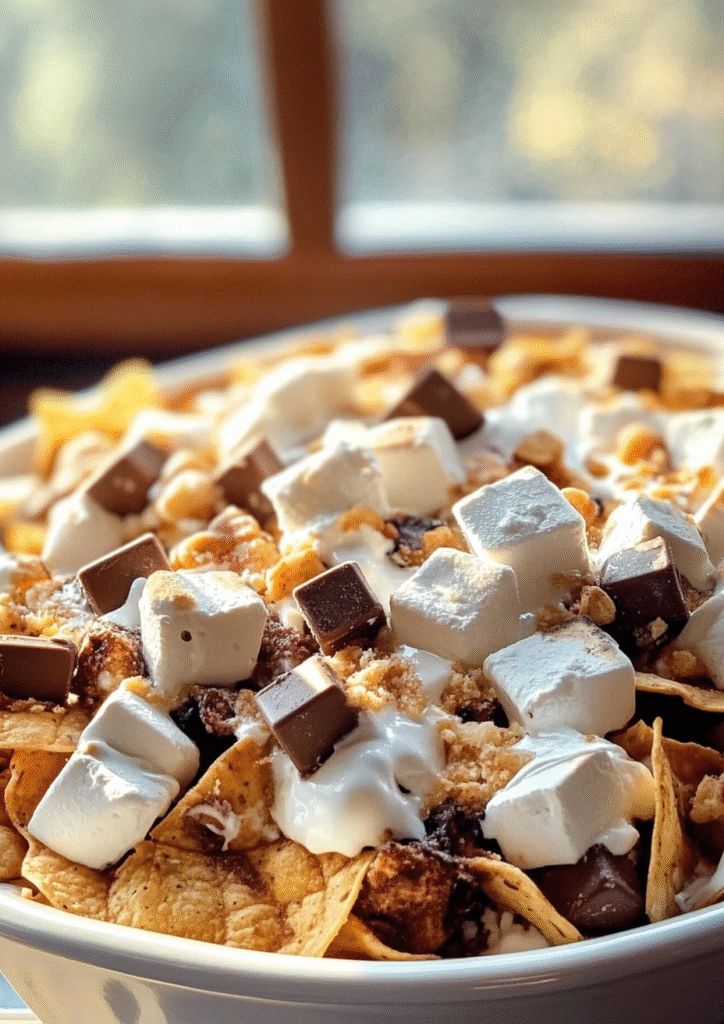
- Gooey, melted perfection: Marshmallows, chocolate, and graham cracker crumbles come together in one warm, sticky-sweet bite.
- Super easy to make: Minimal prep and pantry-friendly ingredients—just layer and bake!
- Fun to share: Serve it straight from the skillet or baking dish for that cozy, pass-the-fork vibe.
- Customizable: Add strawberries, white chocolate, chopped nuts, or drizzle with caramel or chocolate syrup.
- Kid and adult favorite: Brings out the nostalgic joy in everyone—whether it’s family night or a party snack.
- No fire required: You can bake, broil, or grill it depending on your mood or weather.
- Photo-worthy dessert: A guaranteed crowd-pleaser that looks as good as it tastes.
What You’ll Need
Creating the perfect batch of S’mores Nachos starts with assembling the right ingredients. The beauty of this recipe is its flexibility—you can follow the classic approach or add your own creative twists. Below is a list of essentials along with optional ingredients to elevate the experience.
Basic Ingredients:
- Tortilla Chips – 6 cups (about half a large bag)
Opt for plain, lightly salted tortilla chips to balance the sweetness and provide a sturdy base. Thin and crispy chips may break too easily under the toppings. - Mini Marshmallows – 2 ½ cups
These roast and melt evenly, creating gooey pockets throughout. You can also use large marshmallows cut in halves if that’s what you have on hand. - Semi-Sweet Chocolate Chips – 1 ½ cups
This gives a nice balance of sweetness and depth. You could also use milk or dark chocolate chips depending on preference. - Graham Crackers – 4 full crackers, crushed
Adds a familiar crunch and honey-like flavor. Use more if you want extra graham layers on top. - Butter (unsalted) – 2 tablespoons, melted
Optional but adds richness when drizzled lightly over the chips before baking.
Optional Add-ins (for customization):
- Fresh Strawberries or Bananas – sliced, about ½ cup
Add after baking for a fruity twist. - White Chocolate Chips or Peanut Butter Chips – ½ cup
Great for mixing up flavor and color. - Mini Pretzels or Crushed Cereal – ½ cup
Adds a salty crunch to balance the sweetness. - Caramel Sauce or Chocolate Syrup – to drizzle
A finishing touch that elevates the dessert and adds extra richness. - Chopped Nuts (almonds, pecans) – ¼ cup
Optional for added crunch (avoid if nut allergies are a concern).
These ingredients make enough for 4–6 servings. You can scale the quantities up or down depending on the number of guests or the size of your pan.
How to Make S’mores Nachos
Once you have all your ingredients ready, it’s time to layer, bake, and enjoy. This recipe is incredibly simple and beginner-friendly, requiring just 10 minutes of prep and a few more in the oven.
Step-by-Step Instructions:
- Preheat your oven to 375°F (190°C).
If you prefer extra caramelization, you can use the broiler for the final step, but keep an eye on it to prevent burning. - Choose your baking dish.
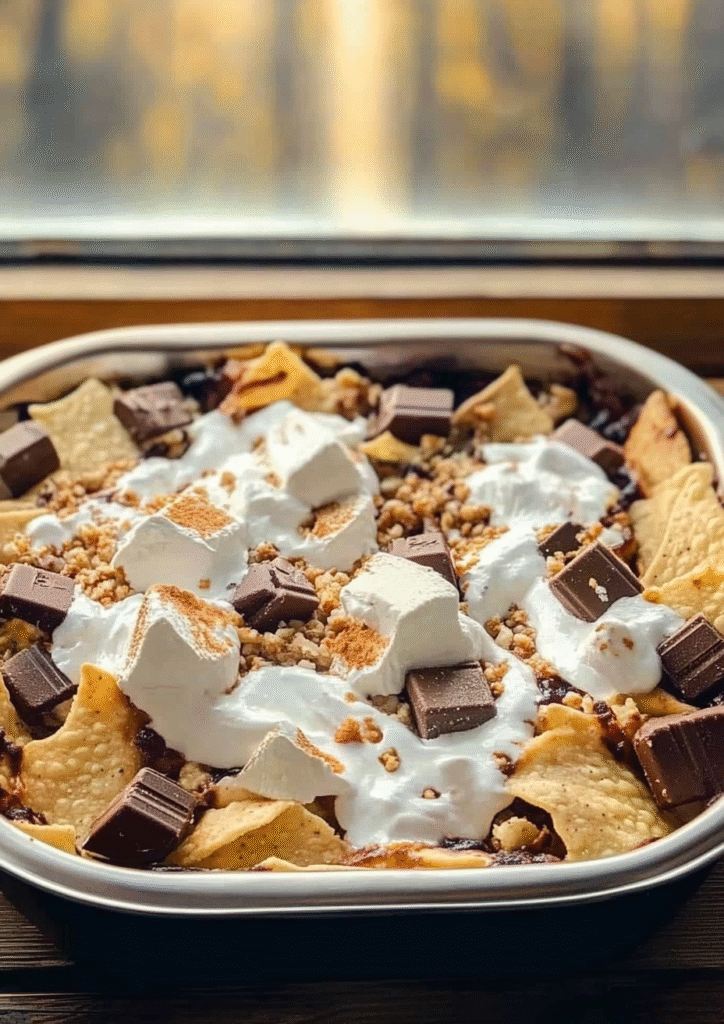
A 9×13-inch baking pan, oven-safe skillet, or cast iron pan works best. Line with parchment paper for easy cleanup if desired. - Start layering.
- Spread half of the tortilla chips evenly in the bottom of your dish.
- Sprinkle ¾ cup of chocolate chips, 1 ¼ cups of mini marshmallows, and half of your crushed graham crackers over the chips.
- Add another layer of tortilla chips and repeat with the remaining toppings.
- Drizzle 2 tablespoons of melted butter across the top if using.
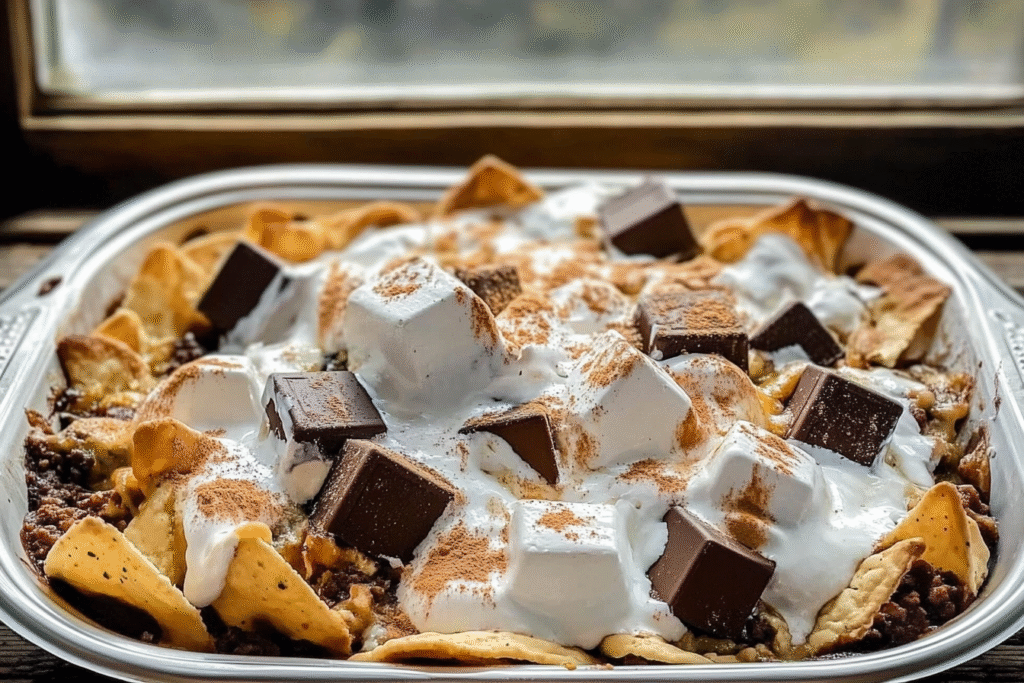
- Bake for 7–10 minutes.
You want the marshmallows to be golden and the chocolate just melted. If you’re using the broiler, 1–2 minutes is enough—but don’t leave it unattended. - Add finishing touches.
Once out of the oven, sprinkle with fresh fruit, chopped nuts, or extra chocolate chips if desired.
Drizzle caramel or chocolate syrup across the top for that glossy, irresistible finish. - Serve immediately.
S’mores Nachos are best enjoyed hot and melty—right out of the dish with spoons, forks, or even more chips for dipping.
You Must Know
Before you start layering up your S’mores Nachos, here are key tips that will save you from common dessert mistakes:
- Use sturdy tortilla chips: Thin ones break or turn soggy fast.
- Go easy on the marshmallows: They expand in the oven—2½ cups is plenty for a 9×13 dish.
- Chocolate chips vs bars: Chopped chocolate bars melt smoother than standard chips.
- Layer smartly: Add chips, then toppings, and repeat. It ensures every bite is loaded with flavor.
- Watch the bake time: Bake at 375°F for 7–10 mins or broil for 1–2 mins max. Keep a close eye to avoid burning.
- Add fresh fruit later: Strawberries, bananas, or berries go on after baking to keep their texture.
- Balance the sweetness: Use lightly salted chips and don’t overload with syrups.
These basics ensure your nachos come out gooey, golden, and Instagram-worthy every time.
Perfecting the Cooking Process
To make your S’mores Nachos truly shine, mastering the baking process is essential:
- Use the right pan: Cast iron or ceramic dishes give even heat and a crispy base.
- Even layering is key: Alternate chips and toppings in two layers for flavor in every bite.
- Bake, don’t rush: Bake on the center rack at 375°F until the marshmallows are golden.
- Skip the fire? No problem: You’ll get a toasty top in the oven—broil for 1 minute if you want that roasted effect.
- Grilling tip: Cooking on indirect heat gives a natural smoky finish.
- Let it rest: Give it 1–2 minutes after baking to set and avoid a sloppy scoop.
- Serve hot: These nachos are best warm—don’t wait too long or the magic melts away!
Add Your Touch
One of the best things about S’mores Nachos? You can customize them endlessly to fit your flavor mood or occasion. Here’s how to make them uniquely yours:
- Fruit lovers: Add sliced bananas, strawberries, or raspberries after baking for a fresh, juicy twist.
- Nutty crunch: Sprinkle chopped almonds, pecans, or walnuts over the top. They add texture and contrast beautifully with the gooey marshmallows.
- Flavor boost: Swap semi-sweet chips for white chocolate, dark chocolate, or even peanut butter chips.
- Sweet sauces: Drizzle caramel, chocolate syrup, or even marshmallow fluff over the baked nachos for extra indulgence.
- Kid-friendly toppings: Try crushed cookies, sprinkles, or colorful mini candies for fun and flair.
- Spice it up: For a grown-up twist, sprinkle a tiny pinch of cinnamon or chili powder with the chocolate (it pairs surprisingly well).
Storing & Reheating
While S’mores Nachos are best eaten fresh and warm, leftovers do happen. Here’s how to store and revive them:
Check out this warm and satisfying recipe next.
Storing
- Let leftovers cool completely, then transfer to an airtight container.
- Store in the fridge for up to 2 days.
- Avoid stacking too much—marshmallows and chips can get sticky and soft quickly.
Reheating
- Oven method (recommended): Preheat to 350°F (175°C). Place nachos in a baking dish and reheat for 5–7 minutes until marshmallows puff up again.
- Microwave method: Not ideal, but works in a pinch. Heat in short bursts (15–20 seconds) and eat immediately before the chips get chewy.
- Add a few fresh chips or toppings before reheating to help restore texture.
Pro tip: If you know you’ll have leftovers, keep extra toppings aside and add them fresh after reheating for the best taste and texture.
Chef’s Helpful Tips
Want your S’mores Nachos to be next-level delicious every time? Here are some pro tips straight from the kitchen:
Don’t miss this quick and delicious favorite.
- Don’t overload: More isn’t always better—too many toppings can weigh the chips down. Keep it balanced for flavor and crunch.
- Line your pan: Use parchment paper or a non-stick baking dish for easy cleanup and serving.
- Use high-quality chocolate: A good chocolate bar (chopped) melts smoother and tastes richer than standard chips.
- Watch your oven: Marshmallows can go from golden to burnt in seconds. Stay close, especially when using the broiler.
- Serve in the same dish: Bake in a cast iron skillet or pretty oven-safe dish and serve it straight to the table—less mess, more charm.
- For outdoor parties: You can prep the nachos indoors and finish them on a grill with the lid closed for a smoky finish.
These tips are easy but make a big difference. A little extra care ensures your S’mores Nachos come out picture-perfect every time.
FAQ
Can I make S’mores Nachos ahead of time?
Not really. This dessert is best served hot and fresh. Prep the ingredients ahead of time, but assemble and bake just before serving.
Try this crowd-pleasing dish next time you’re hosting.
Can I use other types of chips instead of tortilla chips?
Yes, but stick with neutral flavors. Cinnamon pita chips or plain graham crackers are good alternatives.
Are there gluten-free options?
Absolutely! Use gluten-free tortilla chips and GF graham crackers—many brands offer great options now.
How do I keep the nachos crispy?
Don’t overbake, and use a wide, shallow dish to avoid steam buildup. Eat soon after baking for best crunch.
Can I grill these instead of baking?
Yes! Use indirect heat and cover the grill for even toasting. Rotate the dish halfway through for even cooking.
Do I have to use marshmallows?
They’re kind of the star, but if needed, try mini marshmallow fluff dollops or even vegan marshmallows for dietary swaps.
Can I freeze leftovers?
Not recommended—the texture changes too much. Enjoy within 1–2 days for best results.
Conclusion
S’mores Nachos aren’t just a dessert—they’re an experience. They bring together the nostalgic joy of a childhood treat and the shareable, hands-on fun of nachos, all in one easy-to-make, oven-baked creation. Whether you’re gathered around a backyard fire pit, hosting a cozy family night indoors, or just treating yourself to something sweet, this recipe delivers that warm, gooey, chocolate-marshmallow comfort with minimal effort and maximum satisfaction.
What makes this recipe truly special is its versatility. It’s endlessly customizable, quick to prepare, and fun to eat. No campfire? No problem. These nachos can be made year-round in your oven or even on the grill. Want to mix up the toppings? Go for it. From fruits to nutty crunch, caramel drizzles to sprinkles—the possibilities are deliciously endless.
With the tips, techniques, and suggestions we’ve covered, you now have everything you need to make your S’mores Nachos unforgettable. From the crisp chip base to that perfect marshmallow toast, it’s all about creating moments that feel joyful, delicious, and made to share.
So go ahead—grab a dish, pile it high, bake it golden, and serve it warm. Because when dessert tastes this fun, every bite feels like a celebration.
Sweet Campfire Delight: Irresistible S’mores Nachos Made Simple
Description
A fun and gooey twist on the classic campfire treat! These S’mores Nachos are made in the oven with crunchy tortilla chips, melted chocolate, toasted marshmallows, and crushed graham crackers. Perfect for sharing at parties, family nights, or anytime you crave something sweet, fast, and nostalgic.
Ingredients
Instructions
Preheat oven to 375°F (190°C).
In a large oven-safe dish or skillet, layer half the tortilla chips, chocolate chips, marshmallows, and graham cracker crumbles.
Repeat with the remaining ingredients. Drizzle with melted butter if using.
Bake for 7–10 minutes until marshmallows are golden and chocolate is melted.
Optional: Drizzle with caramel or top with fruit after baking.
Serve immediately—best enjoyed warm and melty!
Notes
- Use sturdy chips to hold up under the toppings.
Add fruit after baking to prevent sogginess.
Watch closely while baking—marshmallows toast quickly!
Great for kids and adults alike. No campfire needed!