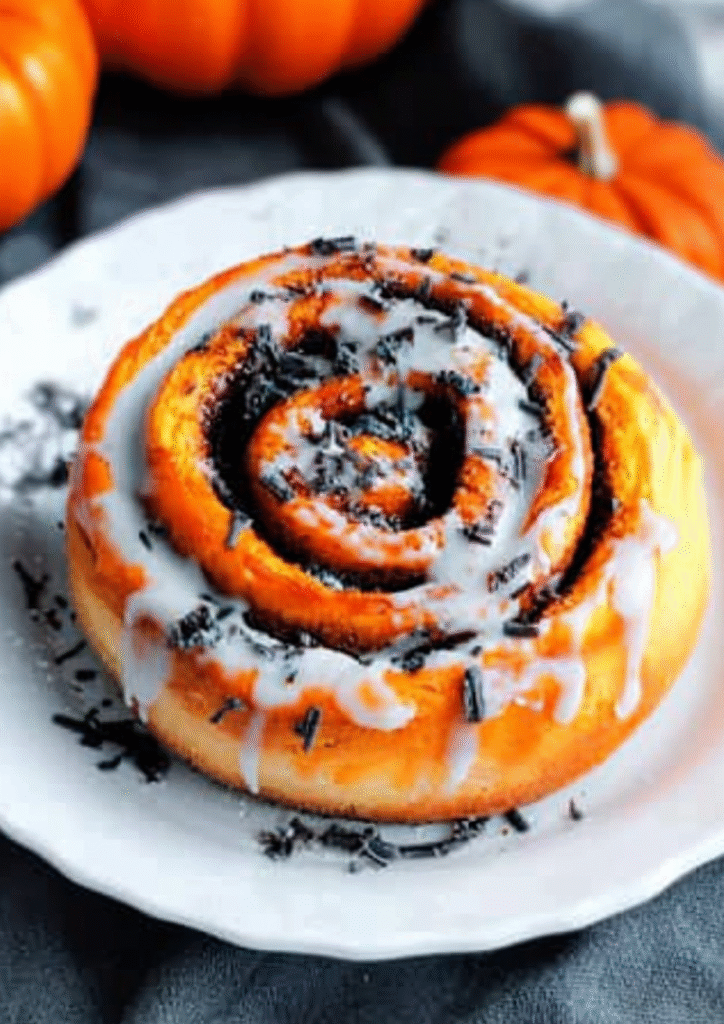
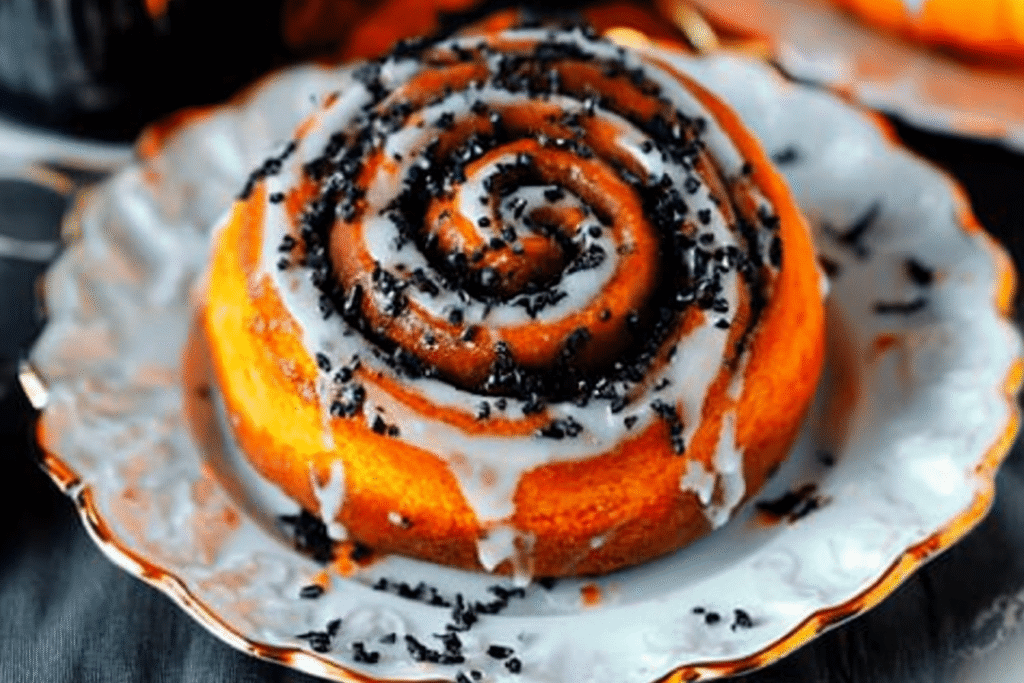
Halloween is the perfect time to mix spooky fun with cozy comfort food, and these Halloween Cinnamon Rolls do exactly that. Imagine soft, fluffy rolls swirled with cinnamon sugar, baked golden brown, and topped with orange and black icing. They’re festive, flavorful, and surprisingly easy to make.
Whether you’re hosting a party, planning a family breakfast, or simply want a seasonal treat, these rolls fit right in. Kids love helping decorate them with sprinkles, candy eyes, or chocolate drizzle, while adults appreciate the warm, nostalgic flavor. Best of all, you can make them with store-bought dough for convenience or go homemade for a bakery-style finish.
These rolls can also be prepped ahead—assemble the night before, refrigerate, and bake fresh in the morning. The smell alone sets the mood for fall gatherings. Simple, fun, and customizable, Halloween Cinnamon Rolls are more than just a recipe—they’re a tradition in the making.
Why You’ll Love This Halloween Cinnamon Rolls
There are plenty of Halloween desserts, but these cinnamon rolls stand out. They’re festive yet comforting, offering that cozy cinnamon-sugar warmth in a fun seasonal package. Unlike candy, they’re hearty and satisfying, perfect for breakfast, dessert, or a party centerpiece.
You’ll also love how versatile they are. Use pre-made dough for a quick option or homemade dough if you want extra softness. Play with decorations—orange glaze, chocolate webs, or candy eyeballs—for endless creativity.
Health-conscious? Adjust sugar, swap in lighter frosting, or add nuts and pumpkin puree. Every version turns out delicious. Plus, kids and adults alike enjoy decorating them, making the process as fun as the final bite.
In short: festive, versatile, customizable, and irresistibly tasty—these rolls are bound to become a fall favorite.
What You’ll Need
Making Halloween Cinnamon Rolls doesn’t require anything fancy—you’ll use mostly pantry staples and a few festive extras for decorating. Here’s a simple breakdown:
- Dough: 1 package refrigerated crescent roll or biscuit dough (or homemade yeast dough if you prefer).
- Filling: ½ cup brown sugar, 2 tablespoons granulated sugar, 2 tablespoons ground cinnamon, and 4 tablespoons softened butter.
- Icing: 1 cup powdered sugar, 2–3 tablespoons milk, ½ teaspoon vanilla extract.
- Food coloring: Orange and black gel or liquid.
- Decorations (optional): Halloween sprinkles, candy eyeballs, mini chocolate chips, or melted chocolate for drizzling.
That’s all it takes to create rolls that are both delicious and spooky. The dough and filling create the warm, gooey spirals we love, while the icing and decorations transform them into Halloween showstoppers.
The best part is flexibility—you can scale up the recipe easily for a crowd or adjust the sweetness to taste. Even better, the decorations are completely customizable, so every batch can look different.
How to Make Halloween Cinnamon Rolls
- Prepare the filling: Mix ½ cup brown sugar, 2 tablespoons white sugar, and 2 tablespoons cinnamon. Set aside.
- Roll out dough: On a lightly floured surface, roll the crescent or biscuit dough into a rectangle. Spread 4 tablespoons softened butter evenly across the surface.
- Add filling: Sprinkle the cinnamon-sugar mix over the buttered dough.
- Roll and cut: Roll the dough tightly into a log. Slice into 8–10 even pieces.
- Bake: Arrange slices in a greased 9-inch baking dish. Bake at 350°F (175°C) for 20–22 minutes, or until golden brown.
- Make icing: Whisk 1 cup powdered sugar, 2–3 tablespoons milk, and ½ teaspoon vanilla until smooth. Divide into two bowls and tint one orange, one black.
- Decorate: Drizzle icing over warm rolls. Add sprinkles, candy eyes, or chocolate drizzle for a spooky touch.
And just like that, you’ve got Halloween-ready cinnamon rolls—soft, sweet, and perfectly festive!
You Must Know
Before diving into this recipe, there are a few things worth keeping in mind to guarantee success. First, dough temperature matters. If you’re using store-bought refrigerated dough, let it sit at room temperature for 5–10 minutes before rolling. This makes it easier to work with and prevents tearing.
Second, the filling ratio is important. Too little filling, and your rolls taste bland; too much, and the sugar may leak out and burn at the bottom of the pan. Stick to the recommended measurements, and if you experiment, adjust carefully.
Another key tip: don’t overbake. Cinnamon rolls should be golden brown, not dry. Check them at the 20-minute mark and pull them out as soon as the centers look set. Remember, they’ll keep cooking a bit after you remove them from the oven.
Lastly, for that festive Halloween look, use gel food coloring instead of liquid. Gel provides more vibrant orange and black without watering down your icing. A few drops go a long way.
Perfecting the Cooking Process
To get bakery-quality rolls at home, it’s all about technique. For soft, fluffy rolls, try placing a small oven-safe dish of water on the bottom rack while baking. The steam helps keep the dough moist and tender.
Spacing also makes a difference. If you like softer rolls, place them close together in the pan so they bake into each other. For more defined, slightly crisp edges, space them farther apart.
When making icing, whisk until smooth and lump-free, and always drizzle while the rolls are slightly warm. This allows the glaze to set beautifully without melting into the dough.
If you want extra Halloween flair, drizzle one color of icing, let it set for a few minutes, then layer the second color on top in a spiderweb pattern. Add candy eyes or sprinkles at the end so they don’t melt.
These small details take your cinnamon rolls from good to unforgettable—soft, gooey, festive, and perfectly balanced.
Add Your Touch Halloween Cinnamon Rolls
The beauty of Halloween Cinnamon Rolls is how easily you can customize them. Think of the base recipe as a canvas—delicious on its own, but even better when you add your personal twist. For instance, try mixing a few tablespoons of pumpkin puree into the filling for a seasonal pumpkin-cinnamon flavor. Or sprinkle chopped pecans, walnuts, or mini chocolate chips before rolling the dough for extra texture.
When it comes to decorations, the options are endless. Use orange and black icing as your base, then top with candy corn, gummy worms, or edible glitter for a playful finish. Want something creepier? Pipe spiderwebs or mummy bandages with white icing and add candy eyes for a spooky touch.
You can also experiment with flavors in the glaze. Swap the milk for orange juice to give your icing a citrusy zing, or add a drop of maple extract for a cozy fall twist. Kids will love experimenting with designs, while adults can get creative with flavor combinations.
The best part? No two batches ever have to look the same. Each tray becomes its own Halloween masterpiece, letting your personality shine through while keeping the classic cinnamon roll comfort intact.
Storing & Reheating
One of the biggest perks of this recipe is how well it keeps. If you’re making rolls ahead for a party or want leftovers for breakfast, storage is simple. Place cooled cinnamon rolls in an airtight container at room temperature for up to 2 days, or refrigerate for up to 5 days.
Discover more recipes perfect for sharing
For longer storage, freeze them. Wrap each roll tightly in plastic wrap, then place in a freezer-safe bag. They’ll last up to 2 months. To serve, thaw overnight in the fridge and warm in the oven at 300°F for about 10 minutes.
Reheating is just as easy. A quick 20–30 seconds in the microwave softens them perfectly, though the oven gives the best “freshly baked” texture. If you’re worried about drying them out, cover with foil before reheating.
If you’ve decorated your rolls, add toppings like sprinkles or candy eyes after reheating to keep them looking fresh. This way, your rolls stay just as festive and delicious as when you first made them.
Chef’s Helpful Tips for Halloween Cinnamon Rolls
If you want your Halloween Cinnamon Rolls to look and taste bakery-worthy, a few pro tips make all the difference. First, don’t rush the process. Even with store-bought dough, take a moment to roll it evenly so your spirals bake uniformly. Uneven rolls can bake at different speeds, leaving some too doughy and others too crisp.
Don’t miss this easy one-pan recipe
When decorating, always let the rolls cool slightly before icing. Too hot, and the icing melts right off; too cool, and it won’t stick as well. Aim for warm but not steaming. To get clean icing lines or spiderweb patterns, use a piping bag or even a zip-top bag with a small corner snipped off.
Another trick? Warm your serving plate in the oven for a few minutes. Serving cinnamon rolls on a warm plate keeps them soft and inviting longer. If you’re hosting a Halloween party, you can also prepare two batches: one classic cinnamon sugar, the other with added pumpkin or chocolate filling. This gives guests options and makes your dessert table feel more festive.
Finally, don’t be afraid to play with toppings. From crushed Oreos to edible glitter, the smallest details can turn a simple cinnamon roll into a memorable Halloween treat.
FAQ for Halloween Cinnamon Rolls
Can I make these the night before?
Yes! Assemble the rolls, cover tightly, and refrigerate overnight. Bake fresh in the morning for best results.
Try another cozy comfort food favorite
Can I use cream cheese frosting instead of glaze?
Absolutely. Cream cheese frosting works wonderfully—just keep it slightly thick so it holds the decorations.
Can I make them without food coloring?
Of course. They’ll still be delicious. You can use natural options like cocoa powder for dark icing or pumpkin puree for orange tones.
What if I don’t have sprinkles or candy eyes?
No problem—drizzle chocolate or white icing in fun patterns for a festive look.
Conclusion
Halloween Cinnamon Rolls are more than just a seasonal dessert—they’re a fun, festive way to bring people together. Warm, gooey, and customizable, they strike the perfect balance between comfort food and spooky creativity. Whether you make them for a family breakfast, a party centerpiece, or a festive treat to enjoy on a cozy fall night, they’ll quickly become a tradition worth repeating every year. Simple ingredients, endless decoration possibilities, and a whole lot of flavor—these rolls are a Halloween must-try!
How to Make Halloween Cinnamon Rolls Step by Step
Description
Soft, gooey cinnamon rolls with a spooky twist—topped with orange and black icing, sprinkles, and candy eyes for the perfect Halloween treat!
Ingredients
Instructions
Preheat oven to 350°F (175°C).
Roll dough into a rectangle and spread butter evenly.
Mix sugars + cinnamon; sprinkle over buttered dough.
Roll tightly, slice into 8–10 rolls, and place in a greased pan.
Bake for 20–22 minutes, until golden.
Mix powdered sugar, milk, and vanilla for icing. Divide and tint orange/black.
Drizzle over warm rolls and decorate with sprinkles or candy eyes.
Notes
- For brighter colors, use gel food coloring.
Add nuts, pumpkin puree, or chocolate chips for a flavor twist.
Store leftovers in an airtight container; reheat in microwave or oven.