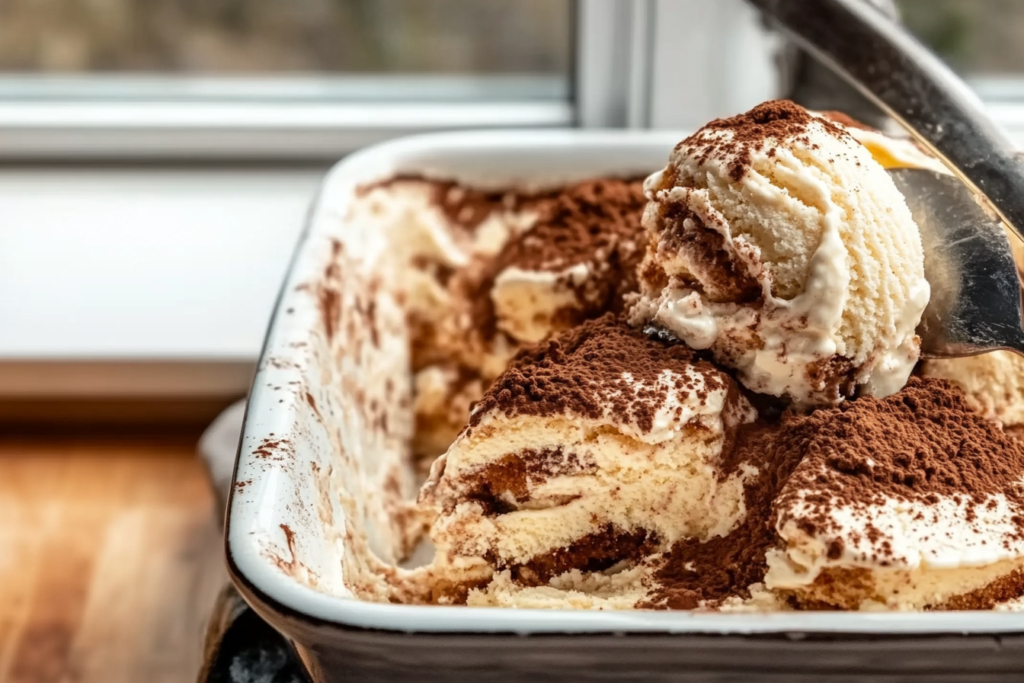
Few desserts evoke indulgence like tiramisu — layers of creamy mascarpone, coffee-soaked ladyfingers, and a dusting of cocoa. Now imagine that same luxurious flavor, transformed into an irresistible frozen treat: Tiramisu Ice Cream Dessert.
This version keeps the beloved flavor profile of the classic Italian dessert but offers a refreshing twist ideal for warm days or elegant entertaining. It’s a dessert that can be made ahead, stored in your freezer, and served whenever the craving strikes.
Best of all, this recipe is completely alcohol-free and family-friendly, replacing any traditional liqueur with strong brewed espresso or coffee. The result? A luscious, scoopable dessert that delights both kids and adults.
Why You’ll Love This Tiramisu Ice Cream
- Iconic flavor: All the bold coffee and creamy notes of classic tiramisu in a cool and creamy ice cream.
- Alcohol-free: Made without liqueur — perfect for family gatherings.
- Easy make-ahead dessert: Store in your freezer and serve when ready.
- Simple ingredients: No complicated techniques or rare ingredients required.
- Customizable: Adjust sweetness, coffee strength, or add chocolate swirls to suit your taste.
- Perfect for warm weather: A chilled twist on a beloved Italian dessert.
What You’ll Need
Preparing Tiramisu Ice Cream Dessert is simpler than you might think, and the ingredients are easy to find at any grocery store. Below is a complete list of what you’ll need:
Main Ingredients:
- 2 cups heavy whipping cream — for that rich, creamy texture.
- 1 cup whole milk — helps balance out the richness.
- 8 oz mascarpone cheese — the key ingredient for authentic tiramisu flavor.
- 3/4 cup granulated sugar — adjust to taste.
- 1 tablespoon pure vanilla extract — rounds out the flavor beautifully.
- 3/4 cup strong brewed espresso or coffee, cooled — provides the signature coffee taste.
- 15-20 ladyfinger cookies (savoiardi) — for layering or folding into the ice cream.
- 3 tablespoons cocoa powder — for dusting and layering.
Equipment:
- Mixing bowls
- Electric hand mixer or stand mixer
- Ice cream maker (optional but recommended)
If you don’t have an ice cream maker, I’ll share no-churn tips later! - Freezer-safe container with lid
- Sifter for cocoa powder
Notes on Substitutions:
- If you prefer a dairy-free version, you can use plant-based heavy cream and mascarpone alternatives.
- For the coffee, you can use decaf espresso if serving to children or those sensitive to caffeine.
- Always use pure vanilla extract for the best flavor — avoid imitation vanilla.
By gathering these simple ingredients, you’re halfway to creating a dessert that will wow your family and friends.

How to Make Tiramisu Ice Cream
Once you’ve got your ingredients ready, it’s time to put everything together. This process is straightforward, and the results are well worth the effort.
Step 1: Prepare the Cream Base
- In a large mixing bowl, combine:
- 2 cups heavy whipping cream
- 1 cup whole milk
- 8 oz mascarpone cheese
- 3/4 cup granulated sugar
- 1 tablespoon pure vanilla extract
- Using an electric mixer, beat the mixture until it becomes smooth and slightly thickened. You want a consistency that holds soft peaks but is not overly whipped.
Step 2: Incorporate Coffee Flavor
- Gently fold in 1/2 cup of the cooled espresso (reserve the remaining 1/4 cup for later). Mix until fully combined.
Step 3: Layer with Ladyfingers
- Dip ladyfinger cookies quickly into the remaining 1/4 cup espresso (just a second or two to avoid sogginess).
- Break or layer the dipped ladyfingers into your freezer-safe container.
- Spoon half of your mascarpone ice cream mixture over the ladyfingers.
- Dust generously with cocoa powder.
Step 4: Repeat Layers
- Add another layer of dipped ladyfingers.
- Top with the remaining ice cream mixture.
- Finish with another dusting of cocoa powder.
Step 5: Freeze
- Cover your container with its lid or plastic wrap.
- Place in the freezer for at least 4–6 hours, or overnight, until fully set.
No-Churn Option:
If you don’t have an ice cream maker, no worries! The method above works perfectly without churning — simply whip the cream mixture well and proceed with the layering and freezing steps.
You Must Know
To ensure your Tiramisu Ice Cream Dessert turns out perfectly, keep these key points in mind:
- Quality ingredients matter — use fresh heavy cream, authentic mascarpone, and brewed espresso (or strong coffee).
- Don’t overwhip — blend mascarpone and cream until soft peaks form. Overwhipping leads to grainy texture.
- Quick dip for ladyfingers — dip for 1–2 seconds only to avoid sogginess.
- Freeze adequately — allow at least 4–6 hours or overnight for best results.
- Serving tip — let dessert sit out for 5–10 minutes before serving for optimal texture.
- Kid-friendly option — use decaf espresso or coffee syrup when needed.
Perfecting the Cooking Process
Though simple, a few tips can elevate your Tiramisu Ice Cream Dessert:
- Balance flavors — taste the cream mixture before layering. Add more espresso for stronger coffee flavor or adjust sweetness.
- Cream texture — whip mascarpone and cream to soft peaks, not stiff.
- Layer thoughtfully — start and finish with cream. Lightly dust cocoa between layers and consider adding grated dark chocolate for extra indulgence.
- Freeze properly — cover tightly and freeze without frequent opening. Overnight freezing provides the best creamy consistency.
- Serving note — for easy scooping, allow dessert to soften briefly at room temperature.

Add Your Touch
One of the joys of making Tiramisu Ice Cream Dessert is how easily you can customize it:
Find your new go-to recipe right here
- Flavor variations: Add a swirl of chocolate sauce, caramel, or coffee syrup into the cream layers for extra richness.
- Chocolate chips: Fold in mini chocolate chips for texture and bursts of flavor.
- Nutty twist: Sprinkle chopped toasted hazelnuts or almonds between layers for a delightful crunch.
- Spice it up: Add a pinch of cinnamon or nutmeg to the cocoa powder for subtle warmth.
- Presentation: Serve in glass jars for individual portions, in an ice cream cone for fun, or layer it in a loaf pan to slice like an ice cream cake.
Your personal touches will make this dessert uniquely yours — have fun experimenting!
Storing & Reheating
Since this is a frozen dessert, “reheating” really means proper softening for serving:
Storing:
- Store in a freezer-safe container with a tight lid to prevent freezer burn.
- Keep frozen for up to 2 weeks for best flavor and texture.
Softening for Serving:
- Transfer the container to the counter about 5–10 minutes before serving — this allows it to soften slightly for easier scooping or slicing.
Tips:
- Do not repeatedly thaw and refreeze, as this affects texture.
- If possible, portion out what you plan to serve and return the rest to the freezer quickly.
Chef’s Helpful Tips
Want to take your Tiramisu Ice Cream Dessert to the next level? Here are some pro tips:
Don’t miss these must-try recipes
- Chill your mixing bowl and beaters before whipping cream — it helps achieve better volume and texture.
- Use high-fat mascarpone for the creamiest result — some lower-fat versions can make the mixture watery.
- Layer carefully — clean, even layers create beautiful slices and a more elegant presentation.
- Taste as you go — adjust espresso strength and sugar level to your preference before freezing.
- For best texture — allow dessert to soften slightly before serving; this makes it smoother and enhances flavor.
Follow these tips, and your tiramisu ice cream will impress every time!

FAQ
1. Can I make this without an ice cream maker?
Yes! Simply whip the cream mixture well, then layer and freeze as directed — no-churn works beautifully.
Discover more delicious recipes here
2. How long will this keep in the freezer?
It stays best for about 2 weeks. After that, texture may change slightly.
3. Can I use decaf coffee?
Absolutely. Decaf espresso or strong decaf coffee works perfectly if you want to make it more kid-friendly.
4. What can I substitute for mascarpone?
Full-fat cream cheese blended with a little heavy cream works in a pinch, but mascarpone gives the most authentic flavor.
5. Can I make it dairy-free?
Yes! Use plant-based mascarpone and heavy cream substitutes — just know that texture may vary slightly.
Conclusion
Tiramisu Ice Cream Dessert is the perfect fusion of classic Italian elegance and modern frozen indulgence. With its creamy layers, bold coffee notes, and delightful texture, it’s a dessert that truly impresses — yet is easy enough for anyone to make at home.
By following the simple steps in this guide and adding your own personal touches, you’ll create a show-stopping treat that’s perfect for summer parties, family dinners, or anytime you want a little sweet escape. And with no alcohol required, this version is fully family-friendly and ready to please every guest.
So gather your ingredients, set aside a little prep time, and treat yourself and your loved ones to a dessert that will surely earn rave reviews. Once you’ve tried homemade Tiramisu Ice Cream, it’s bound to become a staple in your dessert rotation.
Enjoy every bite!
Heavenly Tiramisu Ice Cream Dessert Recipe You’ll Love
Description
Indulge in this creamy, no-bake Tiramisu Ice Cream Dessert, bursting with rich mascarpone and bold coffee flavors. Perfect for warm days or anytime you crave a refreshing, elegant treat.
Ingredients
Instructions
Brew espresso or coffee and let it cool completely. Mix with coffee syrup if using.
Whip heavy cream, mascarpone, powdered sugar, and vanilla until soft peaks form.
Quickly dip ladyfingers into coffee mixture and layer half in a container.
Spread half the mascarpone mixture over ladyfingers. Repeat layers.
Dust the top with cocoa powder and sprinkle with chocolate shavings if desired.
Freeze for at least 4-6 hours or overnight. Let sit 5-10 minutes before serving.
Notes
- Dip ladyfingers quickly to avoid sogginess.
Use decaf coffee for a kid-friendly version.
For a nutty crunch, add toasted hazelnuts between layers.