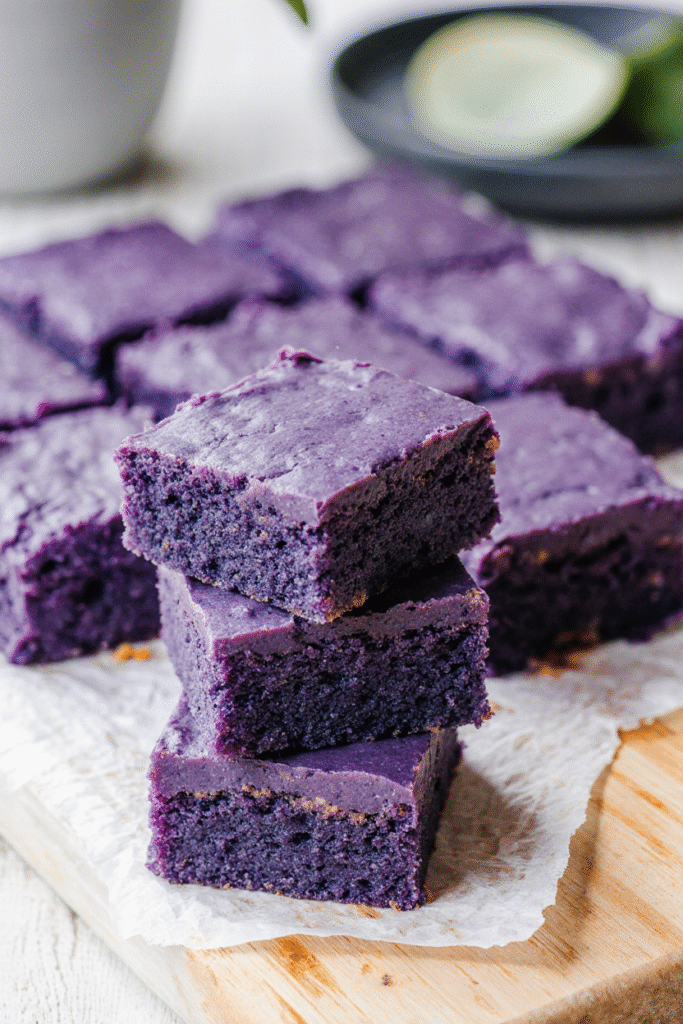
Ube Butter Mochi is a chewy, buttery dessert that combines the classic Hawaiian favorite, butter mochi, with the vibrant sweetness of ube, a purple yam. This colorful treat is perfect for dessert nights, special occasions, or an indulgent afternoon snack. With its soft, chewy texture and rich flavor, it’s a dessert that’s as fun to eat as it is to look at.
This recipe is simple enough for beginners, avoids pork, salami, and alcohol, and delivers a bakery-quality dessert right from your kitchen. Whether you’re making it for family, friends, or just yourself, ube butter mochi is a guaranteed crowd-pleaser.
Why You’ll Love This Ube Butter Mochi
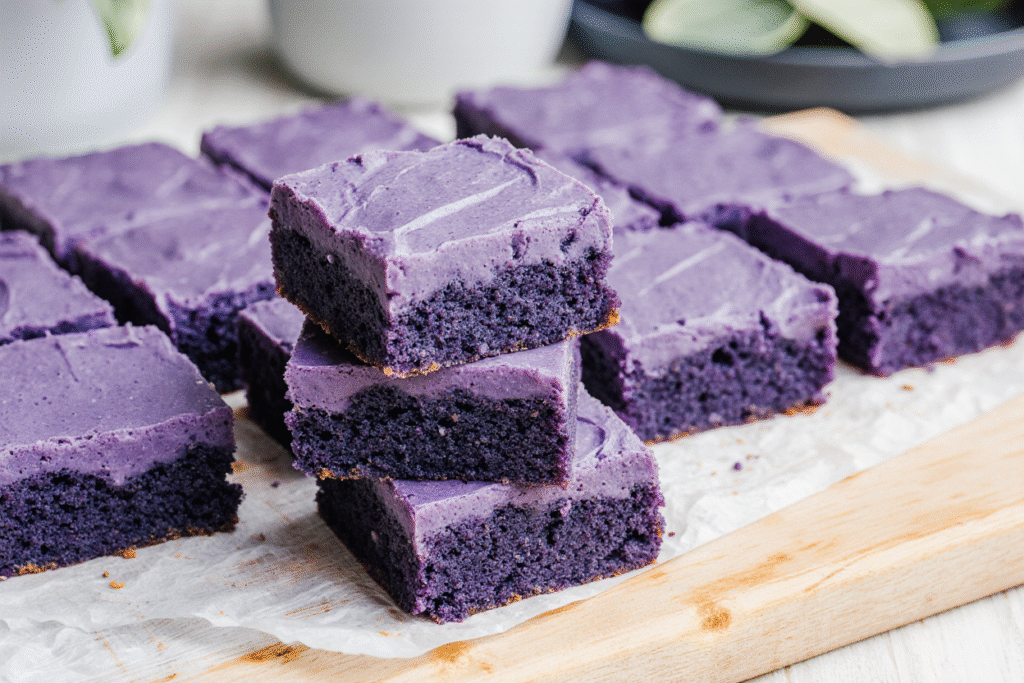
This ube butter mochi is irresistible because of its chewy texture, buttery richness, and natural sweetness. Its vibrant purple color makes it eye-catching, perfect for sharing or posting on social media.
It’s also versatile—you can enjoy it on its own, with ice cream, or topped with coconut flakes. Easy to make, visually stunning, and full of flavor, this dessert is perfect for any occasion, and it keeps well if you want to prepare ahead of time.
What You’ll Need
Making ube butter mochi is surprisingly simple, and most ingredients are easy to find at your local grocery store or Asian market. You’ll need basic baking staples along with ube for that signature flavor and color. Here’s everything you need for one 9×9-inch pan of mochi:
- 1 cup glutinous rice flour – This is what gives mochi its chewy texture.
- 1 cup sugar – Sweetens the mochi perfectly without overpowering the ube.
- 1/2 cup unsalted butter, melted – Adds rich, creamy flavor.
- 1 cup coconut milk – Provides moisture and subtle tropical notes.
- 1/2 cup ube halaya (purple yam jam) – The star ingredient that gives flavor and vibrant color.
- 2 large eggs – Helps set the mochi while keeping it soft.
- 1 teaspoon baking powder – Ensures a light, slightly airy texture.
- 1/2 teaspoon salt – Balances the sweetness and enhances flavors.
Optional toppings include toasted coconut, chocolate chips, or a light dusting of powdered sugar. With these ingredients ready, you’re set to make a dessert that’s chewy, buttery, and bursting with ube goodness.
How to Make Ube Butter Mochi
- Preheat your oven to 350°F (175°C) and lightly grease a 9×9-inch baking pan. Line with parchment paper for easy removal.
- Mix dry ingredients: In a medium bowl, combine glutinous rice flour, sugar, baking powder, and salt. Stir until evenly mixed.
- Combine wet ingredients: In a separate bowl, whisk together melted butter, coconut milk, ube halaya, and eggs until smooth.
- Incorporate dry into wet: Gradually add the dry mixture into the wet mixture, stirring until fully combined and no lumps remain. The batter should be thick but pourable.
- Pour batter into the pan: Spread evenly with a spatula. Optionally, sprinkle with coconut flakes or chocolate chips on top.
- Bake: Place in the oven and bake for 45–50 minutes, or until the top is lightly golden and a toothpick inserted in the center comes out clean.
- Cool and slice: Allow the mochi to cool completely in the pan before slicing into squares. This ensures it holds its shape while keeping its chewy texture.
Your ube butter mochi is now ready to enjoy! Soft, buttery, and packed with vibrant flavor, it’s perfect for dessert or a sweet snack.
You Must Know
To make perfect ube butter mochi, there are a few essentials. Always use glutinous rice flour for that chewy texture—regular flour won’t work. Choose a good-quality ube halaya for vibrant color and natural sweetness.
Proper pan preparation is key: grease and line with parchment to prevent sticking. Smooth the batter evenly before baking for uniform results. Let the mochi cool completely before slicing to maintain its shape.
Storing correctly keeps it chewy—refrigerate in an airtight container if not eating right away. These small tips make a big difference in creating soft, flavorful mochi every time.
Perfecting the Cooking Process
For ideal ube butter mochi, keep your oven at 350°F (175°C) and rotate the pan if needed. Mix ingredients just until combined—overmixing can make it cake-like, undermixing leaves lumps.
Bake for 45–50 minutes, checking with a toothpick; the top should be lightly golden, and the center slightly springy. Let it cool completely in the pan before slicing. Optional toppings like powdered sugar or toasted coconut can add extra flair.
These steps ensure your mochi comes out chewy, buttery, and beautifully purple every time.
Add Your Touch Ube Butter Mochi
Ube butter mochi is delicious on its own, but you can make it even more special by adding your personal touch. Consider toppings like toasted coconut, chocolate chips, or a light drizzle of sweetened condensed milk. These additions enhance flavor and make the mochi more visually appealing.
You can also experiment with mix-ins inside the batter, such as small chunks of white chocolate or a swirl of cream cheese, to create unique layers of flavor. For extra flair, try using different molds or cutting shapes with cookie cutters—perfect for parties or gifting.
Customizing your mochi allows you to match your dessert to your taste preferences while keeping the chewy, buttery texture intact. Simple tweaks can transform this classic treat into something truly your own.
Storing & Reheating
Proper storage ensures your ube butter mochi stays soft and chewy. Let it cool completely, then store in an airtight container. It can be kept at room temperature for 1–2 days or in the refrigerator for up to a week. For longer storage, mochi freezes well—just wrap pieces individually in plastic wrap before freezing.
This recipe will steal the show
To reheat, use a microwave for 15–20 seconds to restore softness, or a steamer for a few minutes. Avoid prolonged reheating, as it can dry out the mochi. Stored and reheated properly, your ube butter mochi will maintain its chewy texture and rich flavor, ready for whenever you want a sweet treat.
Chef’s Helpful Tips for Ube Butter Mochi
Creating the perfect ube butter mochi can be simple if you follow a few professional tips. First, always measure ingredients accurately—glutinous rice flour and coconut milk ratios are key for the chewy texture.
Use a sharp knife or dental floss when slicing the mochi to avoid tearing. Smooth the batter evenly in the pan before baking to ensure consistent cooking, and don’t skip the cooling step; letting the mochi set fully keeps it from falling apart.
Experiment with flavors, but remember less is more—ube is naturally sweet, so you don’t need excessive sugar. Finally, use a lightly greased spatula to lift pieces from the pan, preserving their beautiful purple color and soft texture.
FAQ for Ube Butter Mochi
Q: Can I make this mochi ahead of time?
Yes! You can bake it a day in advance and store it in an airtight container at room temperature or refrigerate for up to a week.
Q: Can I use frozen ube instead of ube halaya?
Yes, but make sure it’s fully thawed and mashed smoothly before mixing with the batter.
Q: Can I freeze the mochi?
Absolutely! Wrap individual pieces in plastic wrap and freeze. Thaw and microwave for 15–20 seconds before serving.
Q: Will it work with regular rice flour?
No—use glutinous rice flour only for that chewy, signature texture.
Q: Can I add other flavors?
Yes! Vanilla, coconut, or chocolate chips work well, but avoid overpowering the ube flavor.
Conclusion
Ube Butter Mochi is more than just a dessert—it’s a vibrant, chewy, and buttery treat that brings both flavor and visual appeal to any occasion. With its rich ube flavor, soft texture, and easy customization options, it’s a dessert that’s sure to impress family, friends, and anyone lucky enough to take a bite.
This recipe is approachable for bakers of all levels, requires simple ingredients, and avoids pork, salami, and alcohol, making it a family-friendly option. From prepping the batter to perfecting the baking process, each step ensures your mochi comes out soft, flavorful, and beautifully purple every time.
Whether enjoyed on its own, paired with ice cream, or topped with toasted coconut, ube butter mochi offers endless ways to delight your taste buds. Make it ahead, store it properly, and reheat when needed—this dessert keeps its chewy charm and vibrant flavor for days.
With these tips and techniques, you’re ready to create a memorable, homemade ube butter mochi that will become a favorite in your kitchen. Treat yourself, share it with loved ones, and savor every bite of this irresistible Hawaiian-inspired dessert.
How to Make Ube Butter Mochi at Home (Step-by-Step Guide)
Description
Soft, chewy, and buttery, this ube butter mochi is a colorful Hawaiian-inspired dessert. Perfect for dessert nights, family gatherings, or a sweet snack anytime!
Ingredients
Instructions
Preheat oven to 350°F (175°C) and grease a 9×9-inch pan; line with parchment.
Mix glutinous rice flour, sugar, baking powder, and salt in a bowl.
In another bowl, whisk melted butter, coconut milk, ube halaya, and eggs until smooth.
Gradually fold dry ingredients into wet mixture until combined.
Pour batter into pan, smooth top, and sprinkle optional toppings.
Bake 45–50 minutes or until lightly golden and toothpick comes out clean.
Let cool completely before slicing into squares.
Notes
- Let mochi cool completely to maintain its chewy texture.
For clean slices, use a sharp knife or dental floss.
Store in an airtight container at room temperature for 1–2 days or refrigerate up to a week.
Reheat with a microwave (15–20 sec) or a steamer to restore softness.